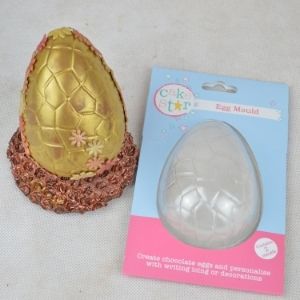
colour splash chocolate easter eggs
17 August 2020
 colour splash chocolate easter eggs
17 August 2020
 colour splash chocolate easter eggs
Create delicious homemade Easter eggs with a splash of colour following our simple step by step guide.

Temper the chocolate. Always do this before using for Easter Eggs. This will ensure a hard shine on the surface and stops ‘blooming’. Although not essential, a thermometer will give guaranteed, accurate results when tempering.
Top Tips:
Use plastic bowls which do not retain the heat when tempering. Wash and dry the moulds thoroughly.
Polish moulds with a clean cloth before use. The more they are polished, the more gloss on the chocolate!
Pour or brush the tempered, melted chocolate evenly onto the inside surface of the mould and place upside down on parchment paper in fridge for 10 minutes to set. Repeat this until you have at least 3 layers and a reasonable even thickness. Take care to neaten the edges for each layer.
When both halves have set completely, remove from moulds carefully. Fix halves together by melting the edges of both halves on a hot surface.
Top Tip: Use cotton gloves to handle. This will prevent finger marks.
This method will make plain, chocolate eggs, but there are numerous ways to do a splash of colour to them, remembering one important factor. When mixing colour into white chocolate, always use powders or oil based colours. Do not use pastes/gels as these are water based and will ‘seize’ the chocolate. To paint onto chocolate successfully, and to guarantee a good result, mix powder colours with melted cocoa butter. You may, however, use rejuvenator spirit if wished.
Spray or flick Colour Splash edible paints onto egg with a brush, or a toothbrush (bought for this purpose only!). This will give a bright abstract design which children will love. In fact recruit them to do it for you!
Brush dry lustre powders onto the egg. For example, gold, copper, ruby, raspberry etc. all look amazing on a milk chocolate egg. Brush on at random or be more specific and brush in stripes.
Spray or flick lustre colours mixed with cocoa butter onto the mould before adding melted chocolate.
Paint on lustre powders mixed with cocoa butter, at random over the mould, then add melted chocolate.
Colour white chocolate with powder colours, mixed in well. Keep to one/two colours or make a marbled effect with a variety of colours.
Spray or flick gold/silver lustre powder mixed with cocoa butter, onto mould first, then add coloured chocolate.
Combine any of the above, such as brushing lustres onto mould first, then after egg has set, adding in more detail by brushing on top as well.
Paint pictures onto egg with edible paints.
Having added colour to the eggs, finish with matching decorations such as flowers, butterflies, Easter cake toppers etc. These can be made, and painted or brushed to match.

You need to Login to add a comment.
We take your security very seriously and have put in place a number of measures that reduce the risk of the website being maliciously attacked. This means that sometimes content on our site will timeout.
Please try to complete the action again.
Please do not click back on your browser as this may cause further issues
If you had products in the basket before your session timed out, don't worry we saved everything exactly as you left it.
Just log back in and we will get you back to where you left off.
Please note: If it's been some time since we saw you last, product availability or prices may have changed, so if anything's missing you may need to find an alternative or get in touch if you have any questions.
Comments
There are currently no comments, be the first to comment.